
On 2 April 1982, Argentine forces invaded the British-administered Falkland Islands, known in Argentina as the Islas Malvinas. The invasion brought a long-running sovereignty dispute between Argentina and the United Kingdom into open war.
Britain faced an extraordinary military problem.
The islands were roughly 8,000 miles from the United Kingdom and only a few hundred miles from the Argentine mainland. Argentina could operate combat aircraft from nearby bases, while Britain had to move ships, aircraft, soldiers, fuel, ammunition, food, helicopters, and spare parts across the Atlantic.
Yet after 74 days of conflict, Argentine forces on the islands surrendered on 14 June 1982.
Why did Britain win the Falklands War despite fighting so far from home?
The answer was not one weapon or one battle. Britain combined naval mobility, carrier aviation, long-range logistics, professional ground forces, intelligence, amphibious operations, and the ability to sustain a campaign thousands of miles from its main bases. Argentina inflicted serious losses—especially through its air force—but struggled to turn those successes into a strategy that could stop the British task force from landing troops and advancing on Stanley.

Why Did the Falklands War Begin?
The Falkland Islands had been administered by Britain since the nineteenth century, while Argentina maintained a sovereignty claim over the islands.
The dispute had lasted for decades and diplomatic negotiations had failed to produce an agreement acceptable to both governments.
In 1982, Argentina was ruled by a military junta led by General Leopoldo Galtieri.
On 2 April, Argentine forces landed on the Falklands and took control of the islands. Argentine forces occupied South Georgia the following day.
Britain's government under Prime Minister Margaret Thatcher decided to send a military task force to retake the islands.
The first major task force ships left Britain on 5 April.
Britain's First Problem Was Distance
The most obvious obstacle was geography.
The Falklands were far beyond the range of normal land-based British fighter operations from the United Kingdom.
Every gallon of fuel, artillery shell, helicopter spare part, ration, missile, and medical supply had to travel enormous distances.
Britain therefore depended on a naval task force supported by the Royal Fleet Auxiliary, merchant shipping, and the important staging base at Ascension Island in the central Atlantic.
Civilian ships were rapidly adapted for military service. Cruise liners, ferries, container ships, tankers, and other vessels became part of the logistical system supporting Operation Corporate, the British codename for the campaign.
Imperial War Museums records that the operation ultimately involved 127 ships of many different types, including Royal Navy, Royal Fleet Auxiliary, and merchant vessels.
Logistics Were One of Britain's Greatest Achievements
Wars are not won simply by putting soldiers on a battlefield.
Those soldiers need food, ammunition, medical support, communications, vehicles, artillery, fuel, and replacement equipment.
Britain created a long maritime supply chain across the Atlantic while simultaneously fighting a naval and air campaign.
This was especially difficult because the South Atlantic winter brought cold, wind, rough seas, and poor visibility.
The success of this supply system allowed Britain to keep two aircraft carriers operating, maintain amphibious forces, land thousands of troops, and then support a ground campaign across East Falkland.
The Aircraft Carriers Were Essential
Britain could not rely on conventional land-based fighters over the islands.
The aircraft carriers HMS Hermes and HMS Invincible therefore became central to the entire operation.
If Britain lost its ability to operate Sea Harriers over the task force, its ships and landing forces would become far more vulnerable to Argentine aircraft.
Protecting the carriers was therefore one of the highest priorities of British naval commanders.
The Sea Harrier Gave Britain Local Air Cover
The Royal Navy's Sea Harrier was one of the most important aircraft of the war.
It could operate from relatively small carriers using a ski-jump deck and did not require a conventional large aircraft carrier.
The Sea Harrier combined the vertical/short takeoff characteristics of the Harrier family with radar for fleet air defense.
It was joined later by RAF Harrier GR.3 aircraft used mainly for ground attack.

Royal Navy records credit Sea Harriers with shooting down 20 Argentine aircraft in air-to-air combat without losing a Sea Harrier in a dogfight.
That does not mean British air power dominated the entire South Atlantic without difficulty.
Argentine pilots repeatedly penetrated British defenses at very low altitude and inflicted serious damage on Royal Navy ships.
But Sea Harriers prevented Argentina from gaining the kind of local air superiority that might have made an amphibious landing impossible.
For more aviation history, explore ThinkAIWorld's Aircraft articles.
Argentine Pilots Were a Serious Threat
Any explanation of the British victory that dismisses Argentine forces as ineffective is misleading.
Argentine Air Force and naval aviation pilots carried out extremely dangerous low-level attacks against British ships.
HMS Sheffield was fatally damaged by an Exocet missile on 4 May.
During the San Carlos landings, Argentine aircraft repeatedly attacked British warships protecting the beachhead.
HMS Ardent and HMS Antelope were lost, and HMS Coventry was sunk on 25 May.
The same day, Exocet missiles struck the merchant ship Atlantic Conveyor, which was carrying aircraft, helicopters, vehicles, and supplies.
Britain won despite these losses—not because Argentina failed to inflict them.
The Loss of Atlantic Conveyor Hurt the Ground Campaign
Atlantic Conveyor was carrying critical equipment when it was hit.
The ship was eventually lost, along with several helicopters, including most of the heavy-lift Chinooks sent south.
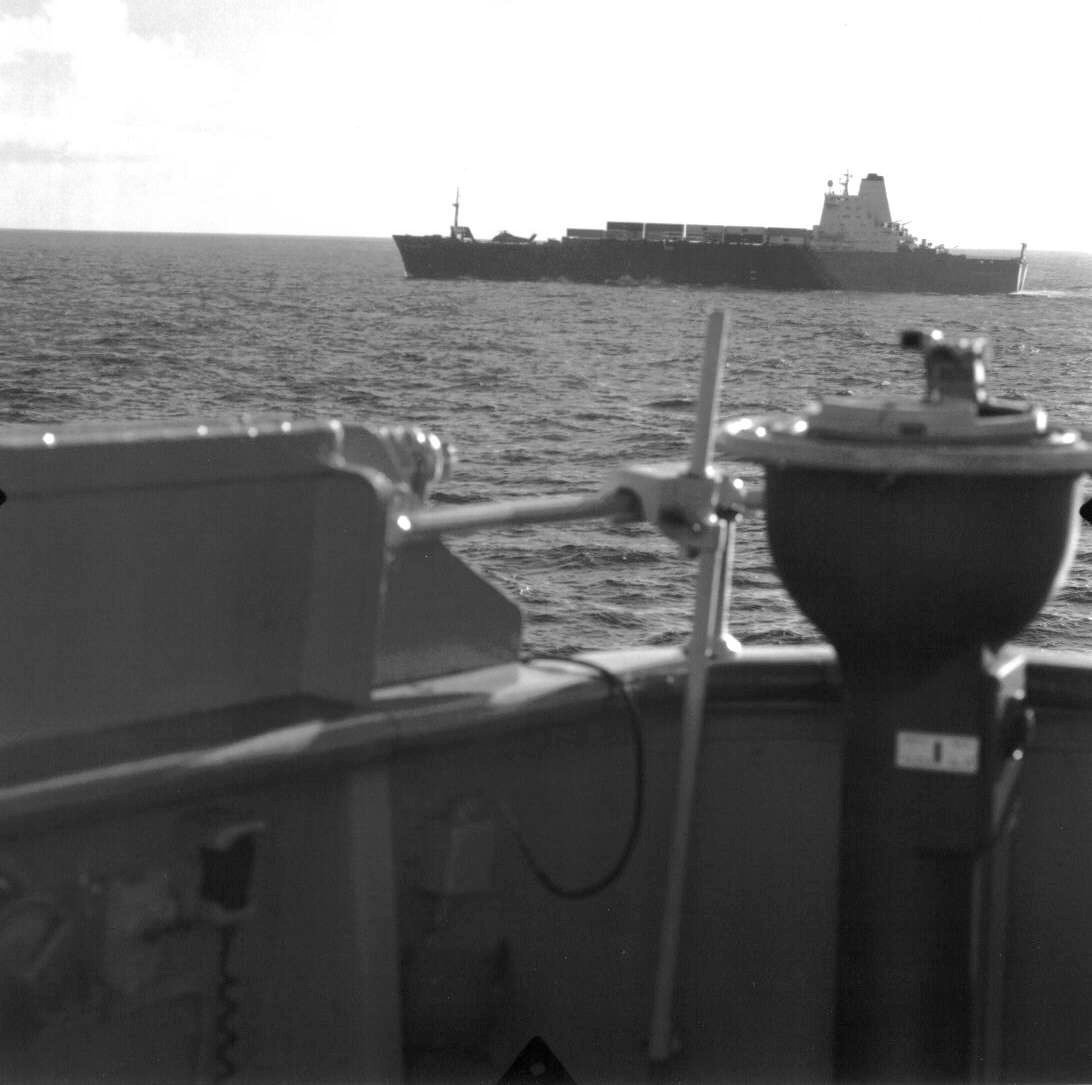
Only one of the deployed Chinooks, later famous as Bravo November, remained available.
The loss reduced Britain's helicopter-lift capacity and forced many troops to move across difficult terrain on foot.
The sinking therefore demonstrates how close logistics and combat were linked throughout the campaign.
British Submarines Changed the Naval Balance
The Royal Navy's nuclear-powered attack submarines were another important advantage.
They could remain submerged for long periods, move rapidly, and threaten Argentine surface warships across a wide area.
On 2 May, HMS Conqueror sank the Argentine cruiser ARA General Belgrano.
The sinking remains one of the most discussed episodes of the war, but its military effect was clear: the threat posed by British submarines became impossible for Argentine surface commanders to ignore.
Afterward, the Argentine surface fleet played a much more limited role in challenging the British task force at sea.
That allowed Britain greater freedom to conduct amphibious operations, although Argentine aircraft remained a serious threat.
Operation Black Buck Showed Britain's Long Reach
The RAF also carried out extraordinary long-range bombing missions from Ascension Island.
On 1 May, a Vulcan bomber attacked the runway at Stanley during the first Black Buck raid.
The mission required an elaborate chain of Victor tanker aircraft to refuel the Vulcan during the roughly 16-hour flight.
The raid damaged the runway but did not permanently close Stanley airfield.
Its military value has been debated, and later Harrier attacks also targeted the airfield.
Still, Black Buck demonstrated that Britain could project air power across an extraordinary distance and forced Argentina to consider the possibility of long-range British air attacks.
Britain Still Had to Put an Army Ashore
Naval and air operations alone could not retake the islands.
British troops had to land, establish a secure beachhead, move across difficult terrain, and defeat Argentine forces defending the approaches to Stanley.
On 21 May 1982, British forces landed around San Carlos Water on East Falkland.

The landing location provided sheltered water and was far from the main Argentine defensive concentration around Stanley.
British Royal Marines and Paratroopers established a bridgehead while Royal Navy ships endured repeated Argentine air attacks in what became known informally as “Bomb Alley.”
Argentina Could Attack the Ships but Failed to Destroy the Beachhead
This is one of the key reasons Britain ultimately succeeded.
Argentine air attacks sank and damaged important ships, but they did not prevent British troops, artillery, ammunition, and supplies from getting ashore in sufficient quantities.
Once a secure land force had been established on East Falkland, Argentina faced a different problem.
It now had to defeat British ground troops while continuing to attack the fleet.
Its air force could cause serious losses, but aircraft flying from mainland bases had limited time over the islands because of distance and fuel constraints.
British Ground Forces Were Generally Better Prepared for the Campaign
British ground units included Royal Marines, Paratroopers, Guards, Gurkhas, artillery, engineers, and supporting units.
Many were professional soldiers with extensive training.
Argentina also fielded professional and capable personnel, and several Argentine formations fought hard.
However, many Argentine Army units on the islands contained short-service conscripts. Training, leadership, equipment, clothing, and supply conditions varied significantly between formations.
This difference became especially important during cold, wet, night fighting across difficult ground.
It would be inaccurate to say every British unit was excellent or every Argentine unit was weak. The quality on both sides varied.
Goose Green Gave Britain Its First Major Land Victory
The first major ground battle occurred around Darwin and Goose Green on 28–29 May.
The 2nd Battalion, Parachute Regiment—2 Para—attacked Argentine positions along the narrow isthmus.
The battle was difficult.
The British attack encountered stronger resistance than expected, and Lieutenant Colonel Herbert “H” Jones, commanding 2 Para, was killed.
Fighting continued until Argentine forces at Goose Green surrendered the following day.

The victory had military and psychological importance.
It removed the Argentine garrison south of the San Carlos beachhead and demonstrated that British troops could defeat prepared Argentine positions on land.
Britain Adapted After Goose Green
One of the most important features of the later ground campaign was heavier preparation and fire support.
The National Army Museum notes that after the experience at Goose Green, British commanders placed much greater emphasis on artillery ammunition, naval gunfire, reconnaissance, and coordinated night attacks for the battles around Stanley.
This is a useful reminder that military success was not automatic.
British commanders learned from earlier fighting and adjusted their methods.
The Advance Toward Stanley Was Physically Brutal
The Falklands terrain was cold, wet, rocky, and often without roads suitable for rapid military movement.
The loss of helicopters aboard Atlantic Conveyor made the situation harder.
Many soldiers carried heavy equipment across long distances on foot—a movement remembered as “yomping” by Royal Marines and “tabbing” by Paratroopers.
Logistics had to move forward with the troops.
Artillery ammunition, medical support, radios, food, and mortars all had to reach units preparing to attack the mountains surrounding Stanley.
The Mountain Battles Broke the Argentine Defensive Line
By June, Argentine forces had established defensive positions on high ground around Stanley.
On the night of 11–12 June, British units attacked Mount Longdon, Two Sisters, and Mount Harriet.
The fighting at Mount Longdon was especially severe. The National Army Museum records 23 British fatalities there, making it the costliest land battle of the war for Britain.
Two nights later, attacks continued against Wireless Ridge and Mount Tumbledown.
These battles pushed British forces through the final major defensive positions outside Stanley.
Fire Support Became a Major British Advantage
The final attacks were supported by artillery, mortars, naval gunfire, reconnaissance, and in some areas light armored vehicles.
For the first phase of the mountain battles, British forces moved nearly 12,000 rounds of 105 mm artillery ammunition forward, according to the National Army Museum.
This concentration of firepower allowed infantry units to attack with far more support than had been available during parts of the Goose Green battle.
Once the outer defensive positions began falling, the Argentine position around Stanley rapidly deteriorated.
Why Didn't Argentina Reinforce the Islands More Effectively?
After Britain established maritime and air pressure around the islands, reinforcing the Argentine garrison became increasingly difficult.
The British submarine threat restricted large Argentine naval movements.
British aircraft and ships attacked supply routes and positions on the islands.
Argentina could still use transport aircraft to reach Stanley, but British attacks restricted operations and heavy equipment could not simply be flown in without difficulty.
The garrison therefore had to fight with limited ability to receive major reinforcements once the British campaign was fully underway.
Why Didn't Argentina's Geographic Advantage Decide the War?
Argentina's proximity to the Falklands was an obvious advantage.
Its aircraft could fly from mainland bases, and its forces had occupied the islands before Britain's task force arrived.
But distance worked against Argentina too.
Many combat aircraft still had only limited time over the Falklands before they needed to return to mainland bases.
British carrier aircraft, by contrast, were operating directly with the fleet near the combat area.
And once Britain successfully established the San Carlos bridgehead, the relevant distance was no longer Britain-to-Falklands. British ground forces were already on the islands.
The Argentine Air Force Came Close to Changing the Outcome
This deserves emphasis.
Several Argentine bombs struck British ships without exploding correctly, often because the aircraft released them at very low altitude and the fuzes had insufficient time to arm.
Had more of those bombs detonated, British naval losses could have been substantially worse.
That does not prove Argentina would certainly have won.
But it shows the campaign contained moments where relatively small technical differences could have had major operational consequences.
Britain's Merchant Fleet Was Crucial
The Falklands War was not fought by the Royal Navy alone.
Merchant ships carried troops, helicopters, equipment, fuel, ammunition, and supplies.
Ships taken up from trade allowed Britain to expand its military sealift capacity very quickly.
The use of merchant vessels was one reason a country thousands of miles away could sustain an expeditionary force in the South Atlantic.
Atlantic Conveyor's loss also showed how vulnerable that system could be.
Command and Political Objectives Were Relatively Clear
Britain's military objective was demanding but geographically clear: regain control of the islands.
Once diplomatic efforts failed and the task force was committed, British commanders could organize naval, air, amphibious, and ground operations around that objective.
Argentina's original invasion had achieved control of the islands, but its forces then had to prevent a superior expeditionary system from building up enough strength to return.
The defensive problem became harder once the British fleet reached the region and established a permanent ground presence at San Carlos.
Argentina's Forces Were Uneven in Quality
It is tempting to explain the result simply by saying Britain had professionals and Argentina had conscripts.
That is too crude.
Argentine pilots displayed exceptional determination and repeatedly attacked heavily defended ships.
Some Argentine Army and Marine units also fought effectively, particularly in prepared positions around Stanley.
But the overall Argentine force on the islands was uneven.
Some conscripts had limited training, and units suffered from logistical, leadership, and supply problems.
Britain was generally able to concentrate better-trained expeditionary troops for the decisive ground fighting.
The War Ended at Stanley
After British forces captured key mountain positions around Stanley, the Argentine commander on the islands, General Mario Menéndez, concluded that further resistance was no longer viable.
Argentine forces surrendered on 14 June 1982.
The 74-day conflict ended with the islands returned to British administration.
The sovereignty dispute itself was not resolved by the war and remains disputed between the United Kingdom and Argentina.
What Did the Falklands War Cost?
The conflict was short but costly.
UK government and RAF commemorative records give a total of 255 British service personnel killed.
649 Argentine military personnel were killed.
Three Falkland Islanders also died.
More than 2,000 people were wounded across the conflict.
The losses are an important reminder that the campaign was not an easy or bloodless victory.
So Why Did Britain Win?
Several factors worked together.
Britain could project naval power over enormous distance. Its carriers, submarines, escorts, auxiliaries, and merchant ships created an expeditionary system Argentina could not prevent from reaching the South Atlantic.
The Sea Harrier denied Argentina air superiority. Argentine pilots remained dangerous throughout the war, but they could not destroy the British carrier force or stop the landings.
British submarines restricted the Argentine surface fleet. After the sinking of General Belgrano, British commanders faced much less danger from major Argentine surface warships.
The San Carlos landing succeeded. Argentina damaged British ships but failed to destroy the beachhead before enough troops and equipment came ashore.
British logistics remained functional despite severe losses. The campaign survived the loss of Atlantic Conveyor and continued moving ammunition and troops toward Stanley.
British ground forces were generally better prepared for sustained expeditionary combat. Training, leadership, night fighting, artillery coordination, and adaptation became particularly important in the final mountain battles.
Argentina's military effectiveness was uneven. Its aircrews and some ground formations fought effectively, but weaknesses in training, logistics, command, and the ability to reinforce the islands reduced the effectiveness of the overall defense.
Was British Victory Guaranteed?
No.
This is one of the most important conclusions from the campaign.
Britain was operating at the end of an extremely long supply line with only two small aircraft carriers.
Argentine aircraft sank or damaged several ships and repeatedly threatened the amphibious force.
The loss of more carriers, landing ships, troop transports, or logistical vessels could have changed the campaign dramatically.
The Falklands War therefore should not be described as an inevitable British victory.
Britain had important advantages, but it still had to make them work under difficult conditions.
Frequently Asked Questions
When did the Falklands War begin?
Argentine forces invaded the Falkland Islands on 2 April 1982. Britain dispatched its task force shortly afterward.
When did the war end?
Argentine forces on the Falklands surrendered on 14 June 1982, ending the 74-day conflict.
Why were Sea Harriers important?
They provided fighter protection for the task force and landing forces. Royal Navy records credit them with 20 air-to-air victories without a Sea Harrier being lost in a dogfight.
What happened to HMS Sheffield?
HMS Sheffield was hit by an Argentine-launched Exocet missile on 4 May 1982. Twenty crew members were killed, and the ship later sank while under tow.
Why was Atlantic Conveyor important?
The merchant ship carried aircraft, helicopters, vehicles, and supplies. Its loss to Exocet missiles on 25 May destroyed valuable equipment and greatly reduced British heavy-lift helicopter capacity.
What happened at Goose Green?
2 Para fought Argentine forces around Darwin and Goose Green on 28–29 May. After hard fighting, the Argentine garrison surrendered.
Did Argentina nearly stop the British landings?
Argentine aircraft inflicted serious naval losses around San Carlos, but they did not destroy enough of the amphibious force to prevent Britain from establishing and supplying a secure beachhead.
Is the sovereignty dispute over the Falklands resolved?
No. The United Kingdom administers the islands, while Argentina continues to claim sovereignty. The 1982 war did not resolve the underlying diplomatic dispute.
Conclusion
Britain won the Falklands War because it succeeded at one of the most difficult forms of military operation: sustaining a joint naval, air, amphibious, and ground campaign thousands of miles from home.
The Royal Navy transported and protected the force. Merchant shipping and the Royal Fleet Auxiliary kept it supplied. Sea Harriers prevented Argentina from controlling the air over the task force. Nuclear submarines constrained the Argentine surface fleet. British troops established a beachhead at San Carlos and then fought their way through difficult terrain toward Stanley.
Argentina was far from ineffective. Its pilots inflicted some of the most serious British losses of the campaign, and several ground units fought hard. Britain also suffered dangerous logistical setbacks, especially the loss of Atlantic Conveyor.
But Argentine forces were unable to stop the British buildup ashore.
Once the San Carlos beachhead survived, Britain could steadily move troops and artillery toward Stanley. Victories at Goose Green and the mountain battles around the capital progressively broke the Argentine defensive position.
On 14 June 1982, Argentine forces surrendered.
The Falklands War therefore demonstrates that geography alone does not determine military outcomes. Britain was much farther from the battlefield, but it possessed the naval reach, logistics, trained forces, and operational organization required to keep fighting until its ground forces reached Stanley.
Sources
National Army Museum — The British Army and the Falklands War
Royal Air Force — Falklands Conflict Overview
Royal Navy — San Carlos Landings
UK Ministry of Defence — Falklands War Commemoration and Casualty Figures
